 Automated post purchase email marketing is a process which entails sending timely and useful email reminders to customers whom have purchased from your eCommerce store. These emails typically will include relevant products and information with the goal of reminding or enticing the email recipient to come back to your store and make a repeat purchase.
When executed correctly, automated post purchase email marketing can extend the LTV (lifetime value) of your customers, bringing your business more sales and revenue.
HubSpot's all in one marketing solution makes this process possible through their easy to setup dynamic content, smart lists and workflow tools. This way eCommerce marketeers, store owners and professionals can use the power of HubSpot to personalize post purchase emails - doing their best to ensure that the content being delivered to their valued customer is relevant and of interest to them.
Read on for Step by Step directions of setting post purchase email automation up in HubSpot.
Step 1
Integrate your shopping cart with HubSpot (click here for documentation).
Make sure you pass all relevant shopping cart fields into HubSpot. My recommendation is generally to pass in all fields minus credit card and billing information.
Step 2
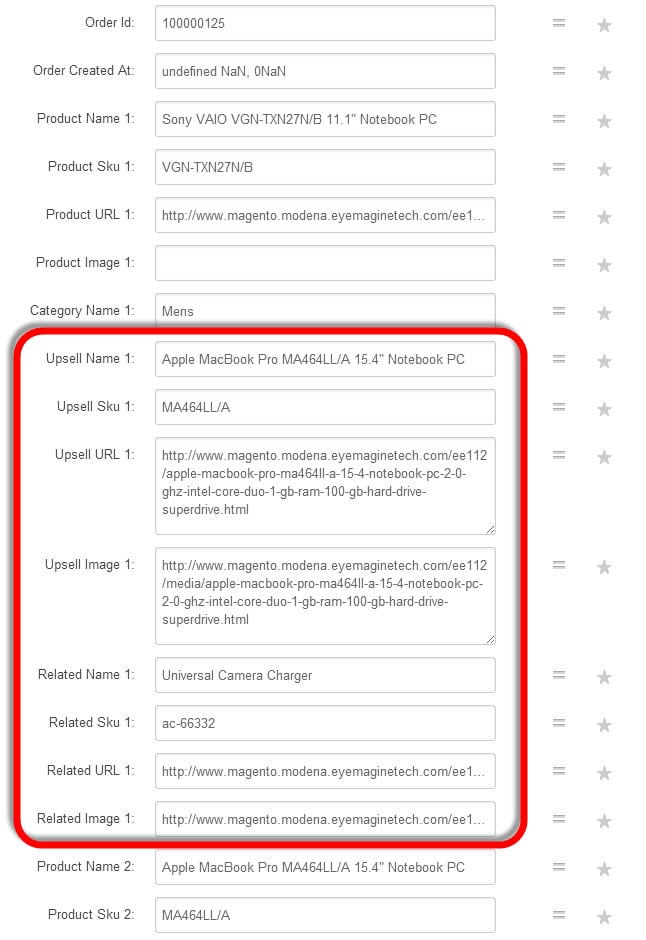
Create Recommended and Upsell custom property fields.
Some shopping carts, like Magento, can auto populate these fields for you based on the item a customer purcahsed. If that is the case, make sure that you include these fields when integrating your shopping cart. If this is not the case, you will need to manually set these properties using Workflows in HubSpot detailed in Step 4.
Step 3
Create Smart Lists for either category or products purchased.
Categories purchased would be my recommendation if you have that option available to you in your shopping cart. Otherwise you will need to setup a list searching for a word in the product purchased field:
List based on a category purchased:
List based on an item purchased:
Step 4
Create Workflow that populates Upsell and Related properties.
* Skip this step if your shopping cart auto-populates this information for you.
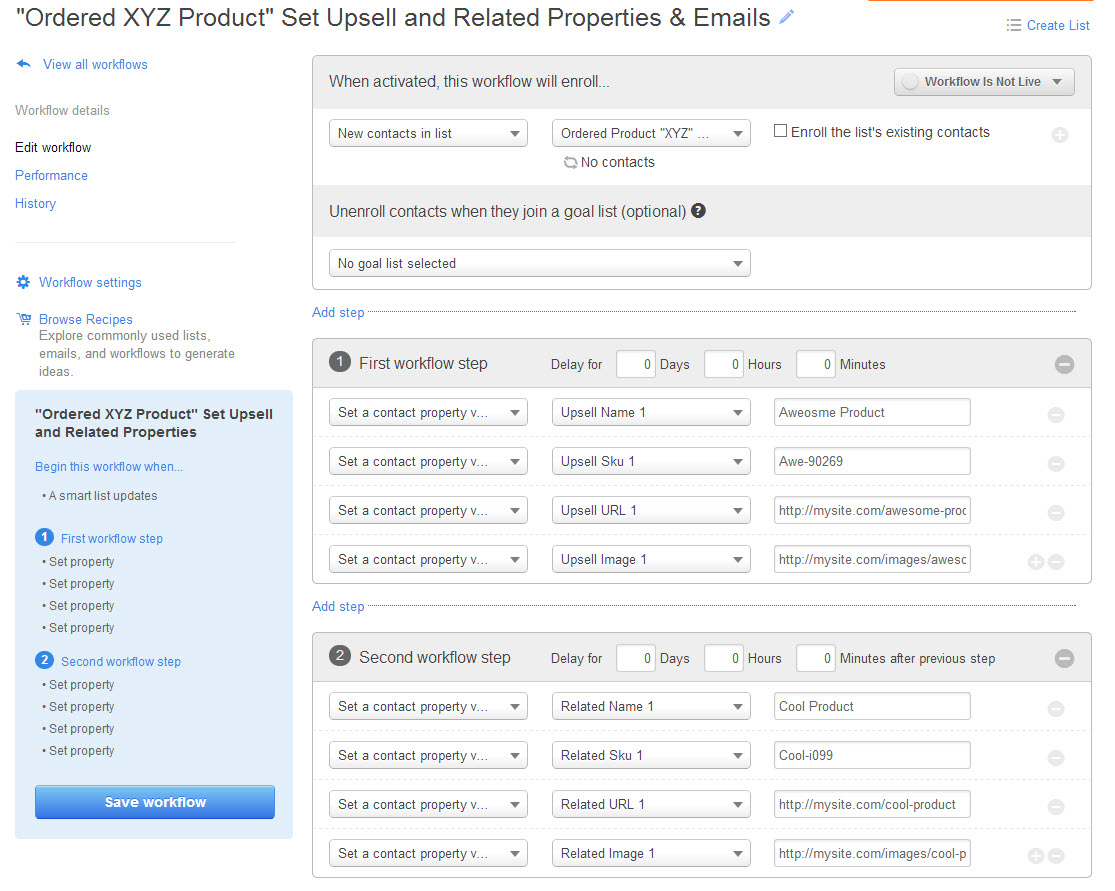
Indicate to HubSpot what should be included in the Upsell and Related Product fields through the workflow automation tool by setting these contact properties. We will use these contact properties in the dynamic email template.
It is important to note that you should create Upsell and Related Product contact properties that you want to use in your post purchase marketing. For this example I used Name, SKU, Product URL and Image URL. However, you may want to use properties like Description and Price if you are going to use these fields in your email templates. Additionally, you may want to create several sets of Upsell and Related product fields. I generally recommend to setup 3-5 sets (ie. Upsell Product 1, Upsell Product 2, Upsell Product 3, etc.)
Notice in the example below how the Image URL is the link to the image and the URL of the item is the url to the product page.
Workflow for Category Purchased:
Workflow for Items Purchased:
Step 5
Create Dynamic Email Template(s).
We now need to create the emails that will be sent in the Post-Purchase Email sequence. We will use HubSpot's dynamic content to alleviate us the pain of creating a new email template for every single product or category purchased email sequence. We accomplish this through dynamic content tokens in the email.
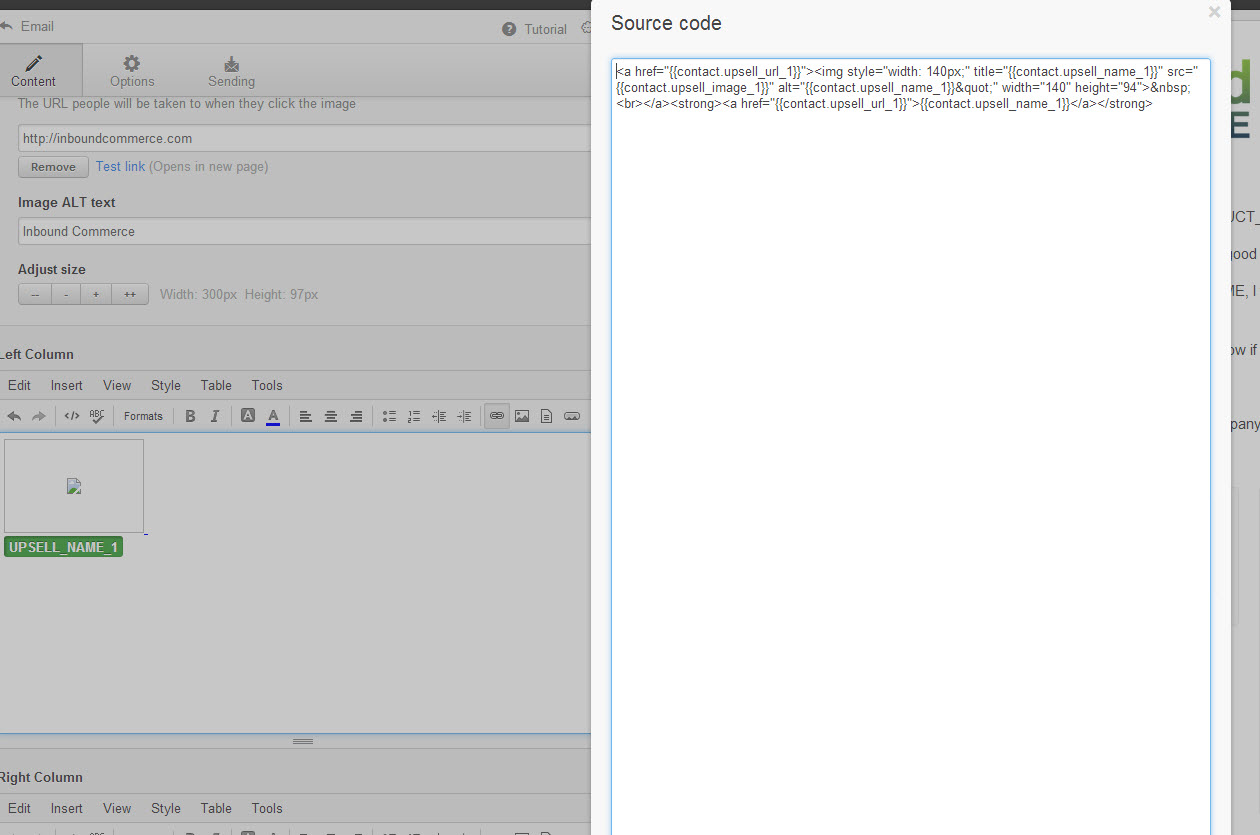
The below example shows the use of the tokens you need to setup. These tokens can and should be written into designed email templates branded for your business.
Email Token Example:
Here is the raw code that you would want to place into an email template:
Create this code, or variations of it, into your email templates into HubSpot. You can add these code to any section of the email tempalte that you would like.
Here is an example of the tokens in use with a HubSpot email template:
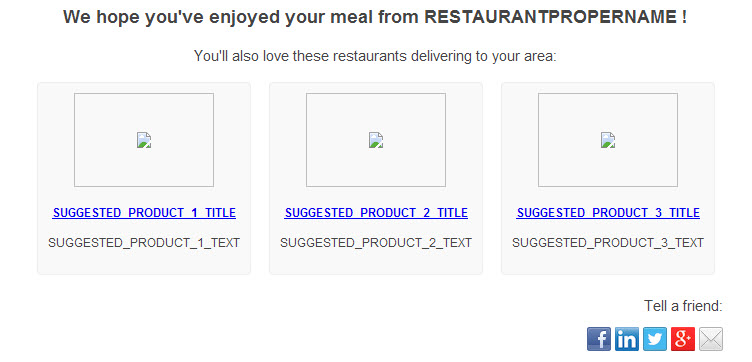
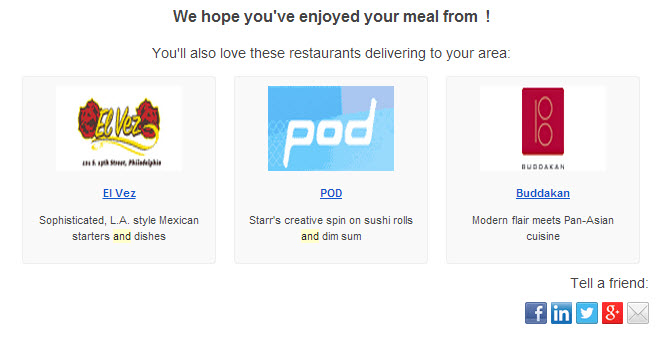
And here is what that template looks like in an email to a customer:
*The restaurant name does not display in the example below because I sent this myself as a test, I did not actually order from a restaurant, hence HubSpot did not populate this field and left it blank. It will populate for real customers.
Step 6
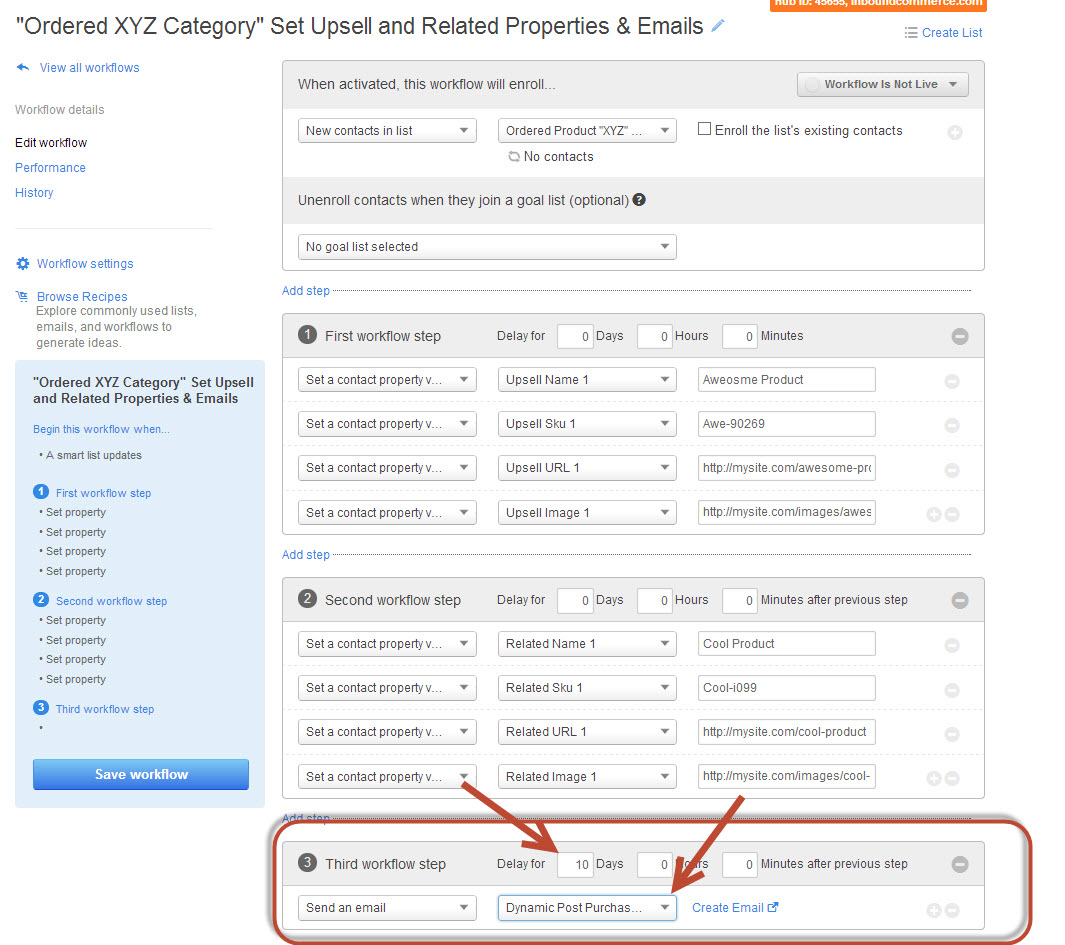
Add Post Purchase Email to the workflow.
Now you simply need to add this email to any post purchase workflows that you setup. The dynamic tokens make it usable across all workflows. So you should use this email template in all of your workflows!
Make sure to set the time delay that makes the most sense for your customers.
Step 7
Repeat Steps 3, 4 and 6 for all categories and products you want to setup post purchase email nurturing for.
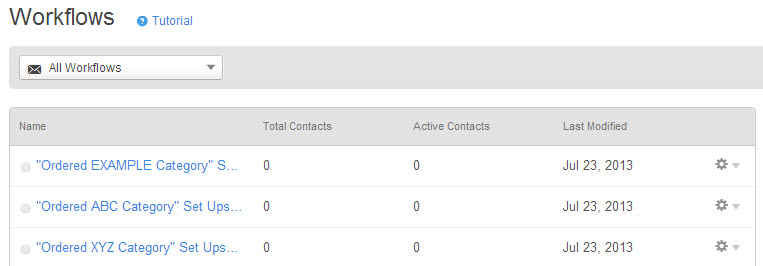
The end result should be workflows for your categories or products that you want to setup for post purchase nurturing.
Step 8
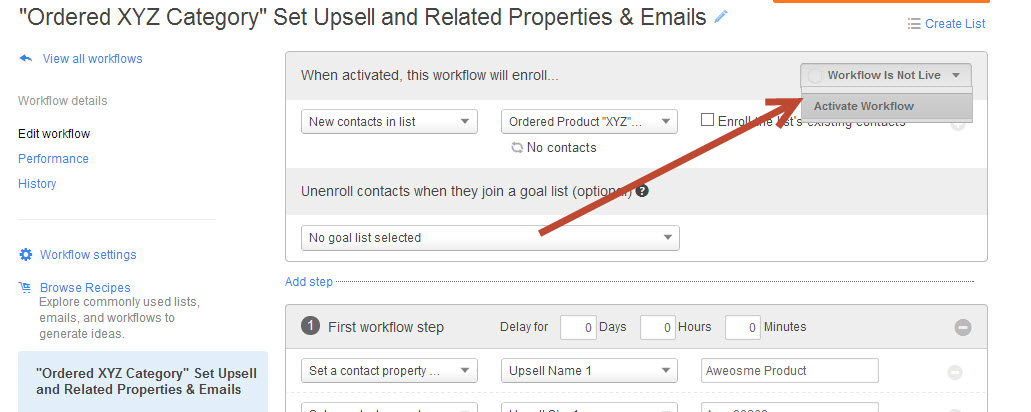
Activate the workflows and give yourself a high five.
Activate Workflows:
Give yourself a high five:

Congrats! You just setup an impressive Post Purchase Dynamic Email Automation solution.
Go tell your boss you need a raise :]
I hope that you received some use out of this tutoiral. If you are interested in learning more about eCommerce Inbound Marketing, I suggest you pickup a copy of our book by clicking the image below.
Thanks for reading - let me know your thoughts in the comments!


