 Have you ever tried a to-do list system or app only to find yourself days, weeks or months later frustrated that you never kept with it?
Personally I've tried a lot of them. Gmail Tasks, Todo.ly, Wunderlist, Evernote, Basecamp, old fashion pen and paper, sticky notes and most recently Workflowy.
Unfortunately no system sticks with me for more than a couple of months. I get busy and forget to add tasks, I work in my email and take care of things and just forget to update the to-do list. So the system falls by the way-side and I get frustrated that I'm not staying organized. Sound familiar? If so, you're in luck.
I've devised a way to create a to-do list in the one system that you'll never leave -- you're email inbox. Prepare for a life changing moment :]
How To Setup Gmail As Your To-Do List
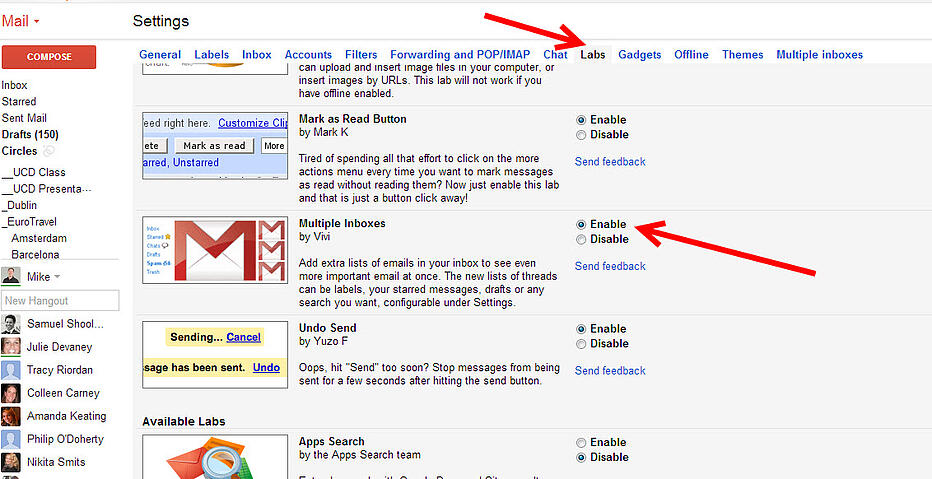
Step 1 - Enable Multiple Inboxes
Go to Settings and Labs. Enable Multiple Inboxes.
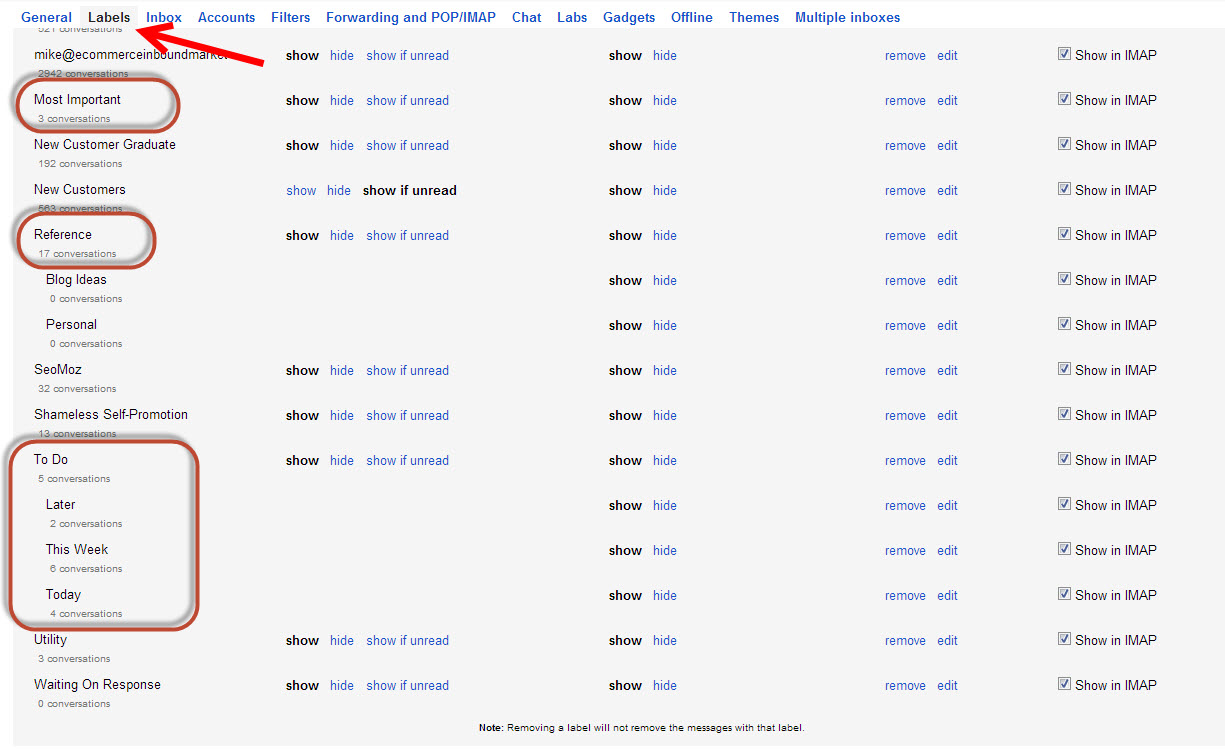
Step 2 - Create To Do labels
Go to Labels in Settings and create your the labels. I've created a couple of labels for To-Do's and then two seperate labels that I use for "Most Important" and "Reference".
You should create labels that make the most sense to you. The labels I use work for me, but not be optimal for you. Most likely the To Do: Today, This Week and Later will work for you. However, you may find that creating a label like "New Orders" is better suited than "Reference".
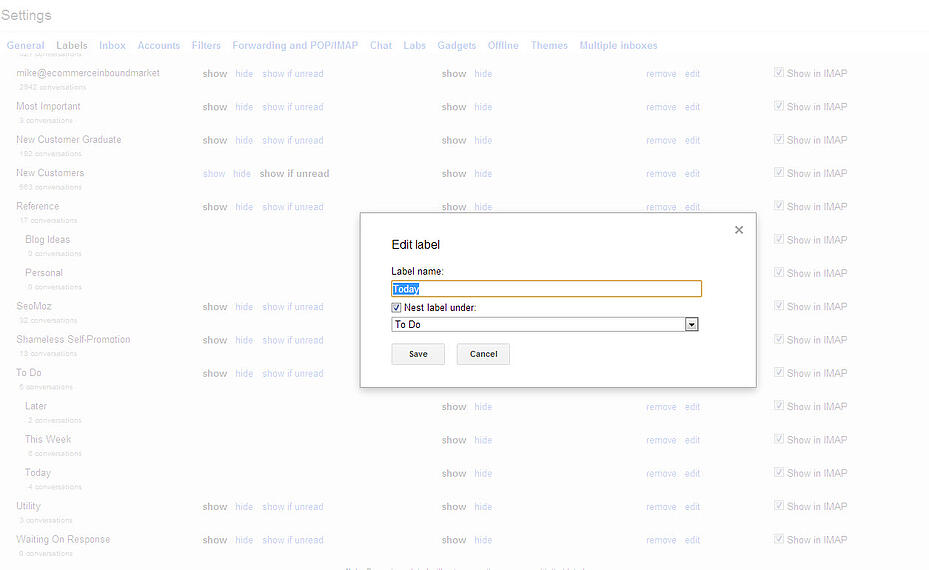
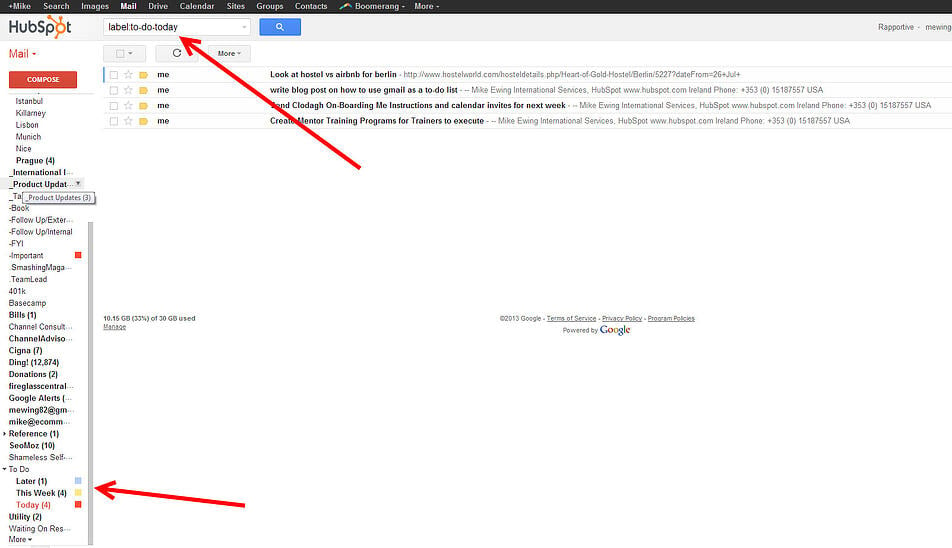
You can nestle labels as well. I nestled Later, This Week and Today under To Do:
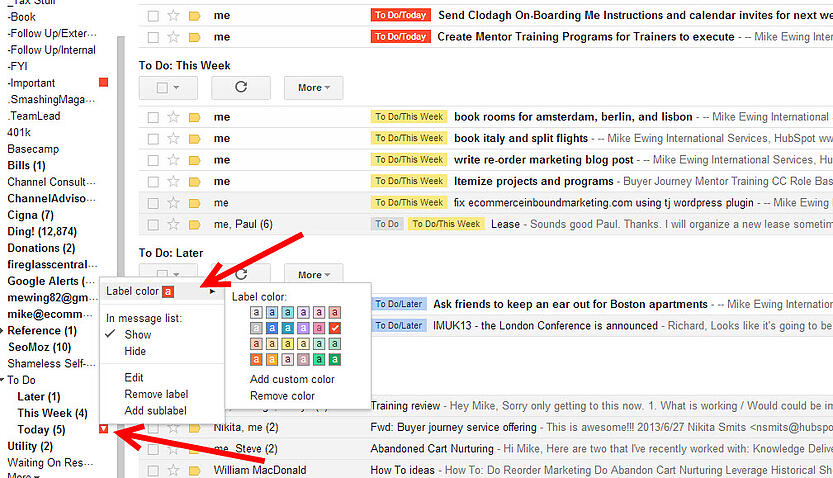
Step 3 - Color Code the Labels
This is an optional step, but one that I think visually makes the inbox a bit more engaging. First click on the little drop down that appears next to the label, then choose Label Color and pick the color you'd like to associate with that label.
Step 4 - Get the Label Search Query
Now that you've setup your labels, you need to get the code that Gmail uses to look up the label. Simply click on the first label, let's say "Today", and copy the code that appears in the search box.
Step 5 - Setup Multiple Inboxes
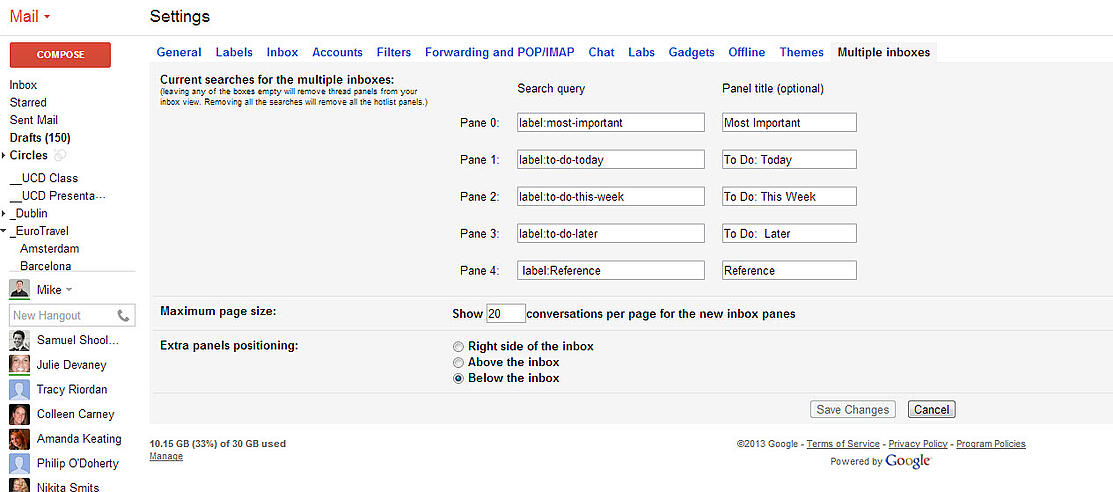
Go back into Settings and you should see an option for Multiple Inboxes. Use the label search query you got from the previous step to setup your Multiple Inboxes. Give the inbox the desired name to display as the Panel title.
Step 6 - Create a Filter for Labels to Skip the Inbox
Next setup a filter to have your messages skip the inbox entirely and just appear in the appropriate labeled inbox. This way your inbox functions like a true to-do list and doesn't clutter up incoming messages.
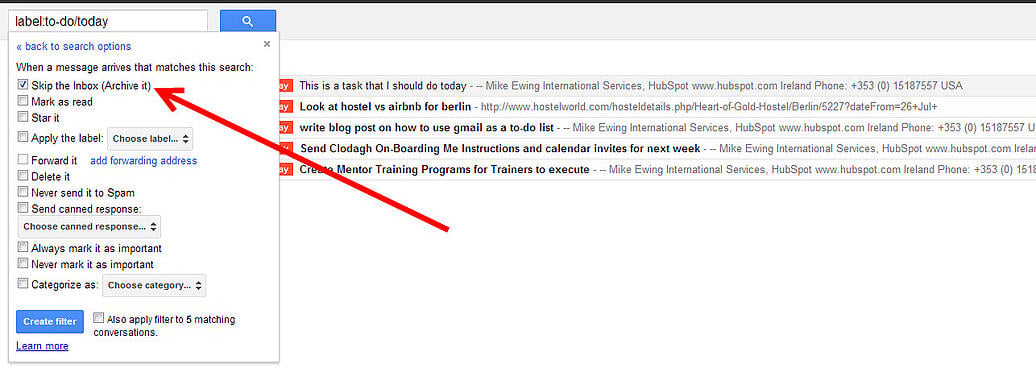
First, click on the label to create a filter for and click the small drop down arrow in the search box:
Then click on Create filter for this search and OK.
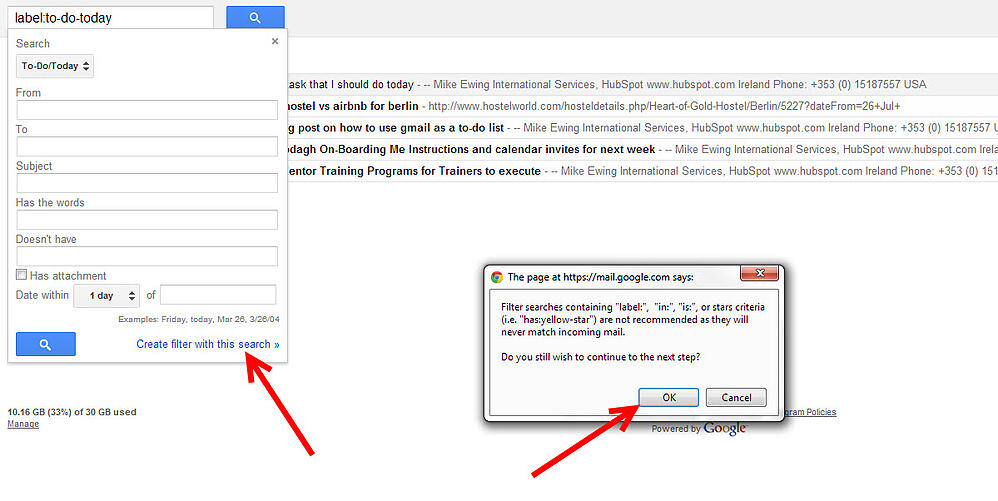
Finally, choose the option to Skip the Inbox (Archive it)
Step 7 - Send a Task via Email
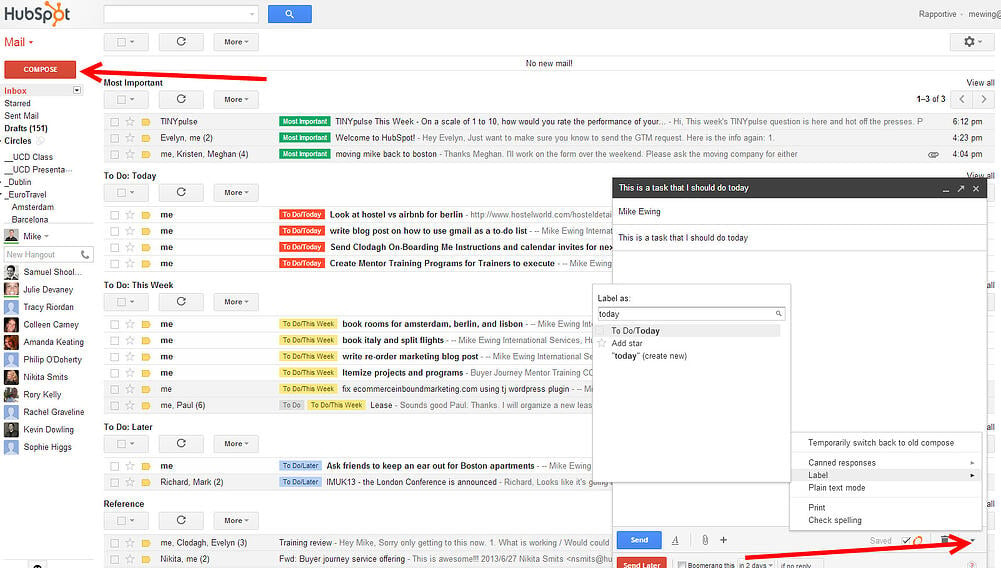
Compose a new message to yourself of the task that needs to be done. Label the message before sending.
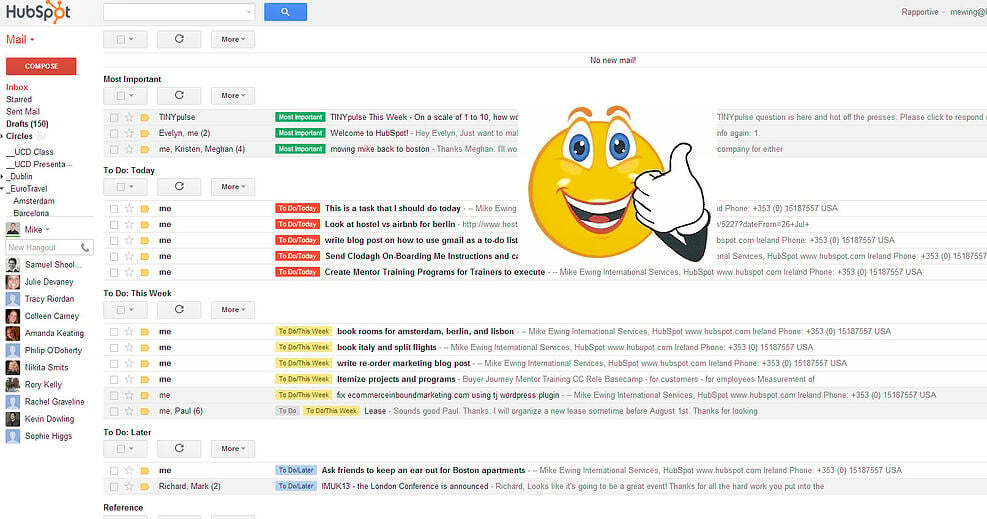
You should see that your message skipped the inbox and went straight to your Today To Do List.
Step 8 - Maintain Inbox Zero
Maintain Inbox Zero by "Moving" messages in your inbox to the appropriate label.
Whenever you get a new message or you open your inbox to tackle the flood of incoming emails, label 'em in your to-do list!
Step 9 - Complete Tasks
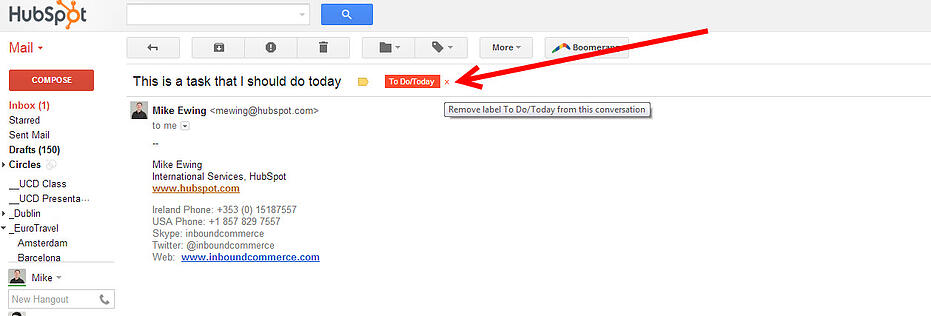
You simply need to remove the label once you've completed your task. Click into the email and remove the label.
The message has already been archived from the inbox by the filter setup in Step 6. Once you remove the label, the message will leave your inbox. Task complete.
Step 10 - Enjoy Your New To Do List
Hopefully this process works for you and give you some piece of mind.
Whenever a task comes to enters your head, pop into your mail either on either desktop or mobile and send the task for your to-do list. When you get a new email message, apply the appropriate label and organize it into your to-do list.
My productivity and organization have vastly improved using this hack I came up with. I'm able to respond to messages in a much more timely fashion and can leave work without thinking about messages I need to respond to or tasks that I need to do. Hopefully the same happens for you too.
Although this post doesn't discuss eCommerce specific advise, I hope that it was able to make your life more efficient. If your interested in eCommerce and want to learn to sell better online, please check out the book below.


